How to Build a Robot for Beginners Simple Steps Explained
Building a robot has become more accessible than ever for beginners. The robotics industry is rapidly growing, with a projected market value of $149.7 billion by 2026, according to a report by Markets and Markets. This growth opens doors for enthusiasts eager to explore robotics. However, many beginners face challenges in understanding where to start. It's essential to grasp fundamental concepts to avoid potential pitfalls.
Dr. Jane Smith, a leading expert in robotics, once stated, "To build a robot is to embrace both creativity and logic." This reflection encapsulates the journey of innovation. While the excitement of creating a robot is palpable, beginners often overlook the importance of a structured approach. They may jump into complex designs without mastering basic skills. This common trap can lead to frustration.
Even with simple projects, unforeseen challenges arise. Beginners might struggle with coding or assembling components. Mistakes are part of the learning process. Each failure can teach valuable lessons and encourage perseverance. Ultimately, the aim should not merely be to build a robot but to understand the underlying principles of robotics. With the right guidance, even the simplest projects can lead to groundbreaking ideas.
Understanding the Basics of Robotics for Beginners
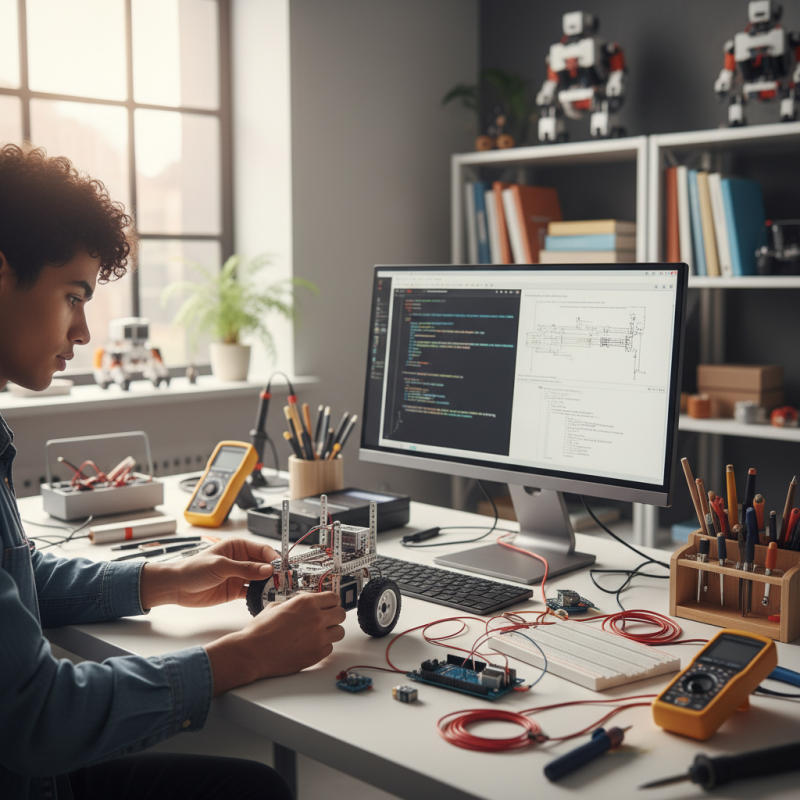
Robotics is an exciting field that many beginners want to explore. Understanding the basics is crucial. You don't need advanced skills to start. Begin with simple concepts like sensors and motors. These components make robots function. For instance, a small motor can turn wheels. Simple sensors can detect obstacles. These elements work together to create movement.
When building your first robot, expect challenges. You might struggle with wiring or programming. It’s common to face difficulties in coordination between parts. Trial and error are part of the learning process. Not every attempt will succeed, and that’s okay. Reflect on what went wrong. Adjustments lead to improvements.
Start with an easy project. Maybe a line-following robot, which uses sensors to navigate. Over time, these experiences will deepen your understanding. Remember, practice is key. Engage with online communities to share your progress. You'll receive feedback that can guide you. Embrace the journey of learning. Every mistake teaches valuable lessons.
Robot Components Proportion for Beginners
This bar chart represents the proportion of different components used in building a robot for beginners. Understanding these components is essential for anyone looking to venture into robotics.
Choosing the Right Components for Your First Robot
Choosing the right components for your first robot can be a daunting task. Start with a solid base. Consider using a simple chassis. Ensure it’s lightweight yet sturdy. This balance helps with mobility and strength. Choose wheels that suit your design. Larger wheels offer better navigation on uneven surfaces.
Next, focus on the electronic components. A basic microcontroller is essential. It acts as the brain of your robot. When picking sensors, think about the tasks you want your robot to perform. Avoid overcomplicating things. Too many sensors can lead to confusion in programming.
Wiring is another critical area. Avoid tangled wires; they can cause issues later. Use a clear layout to keep things organized. Remember, mistakes happen. Sometimes, components won't work as expected. Reflect on what went wrong. Making adjustments and learning from failures is part of the process. Embrace the challenges; they enhance your understanding.
How to Build a Robot for Beginners Simple Steps Explained - Choosing the Right Components for Your First Robot
| Component |
Description |
Recommended Specifications |
Estimated Cost |
| Microcontroller |
The brain of the robot, responsible for processing inputs and controlling outputs. |
Arduino Uno, Raspberry Pi Zero |
$20 - $35 |
| Motors |
Provide movement to the robot, drive wheels or robotic arms. |
DC motors, Servo motors |
$5 - $15 each |
| Chassis |
The body of the robot that holds all components together. |
Plastic, Aluminum, or Wooden frames |
$10 - $50 |
| Sensors |
Collect data from the environment, such as distance, light, or temperature. |
Ultrasonic sensor, Light sensor |
$2 - $15 each |
| Power Supply |
Provides energy necessary for the robot to operate. |
Rechargeable batteries, Power banks |
$10 - $30 |
Step-by-Step Guide to Assembling Your Robot
Building a robot can be an exciting journey for beginners. It’s important to approach it step-by-step. Start by gathering all necessary tools and parts. You’ll need sensors, a microcontroller, and wheels. Organizing these components helps streamline the assembly.
Understanding each part’s role is crucial. For instance, sensors detect the environment while the microcontroller processes this information. It might take time to connect everything correctly. Mistakes will happen, and that’s okay. Document your errors. This reflection can guide future projects.
Once assembled, test your robot. Initial tests may not go as planned. If it doesn’t move, check the connections. Sometimes, it might require a simple reset. Keep experimenting with different designs. Each attempt brings valuable learning experiences.
Programming Fundamentals for Robot Control
Programming a robot can seem daunting. It's essential to grasp the fundamentals first. Start with simple languages like Python or Scratch. These languages have clear syntax and are beginner-friendly. They allow you to focus on the logic without getting overwhelmed by complex code.
Tips: Break problems into smaller parts. This strategy makes coding more manageable. Don’t avoid seeking help. Online communities can offer support and resources.
As you progress, experiment with basic commands. For instance, make your robot move forward, backward, or turn. Adjust the speed and direction based on your commands. It’s a learning process, so don’t worry about mistakes. Reflect on these errors. They often lead to valuable insights.
Tips: Keep a coding journal. Documenting your challenges and solutions can enhance your learning. Regular practice is crucial. Building a routine can solidify your skills over time.
Testing and Troubleshooting Your Robot's Performance
Testing your robot’s performance is crucial. After building, run a series of tests to ensure it works as intended. Observe how it responds to commands. Is it moving as expected? Note any delays or erratic movements. Adjustments may be necessary.
Try different terrains and obstacles during testing. Your robot should navigate smoothly on flat surfaces, slopes, and rough ground. If it struggles, assess its sensors and wheels. Ensure they are functioning properly. Fine-tuning your design can lead to better performance. Collect data to analyze progress.
Tips: Keep a notebook handy to track changes and outcomes. Small tweaks can make a big difference. When troubleshooting, approach each problem methodically. Break it down into smaller parts. This will help identify the root cause more easily.
Don't forget to review your work. Reflect on what has gone well and what hasn’t. Learning from mistakes is part of the process. Embrace the challenges, and don't hesitate to restart if necessary. Each attempt brings you closer to a successful build.


Fabricator
Inside Sales and Client Support Manager
Glass Handler – 1st Shift