Taking Custom Design to New Levels
PROUD TO BE PART OF THE BRIN FAMILY OF COMPANIES

OTHER BRIN LOCATIONS
Brin Glass Company | Minneapolis, MN
St. Germain’s Glass | Duluth, MN
Heartland Glass | Waite Park, MN

A Bath Exhaust Fan can seem like a simple purchase: check the size, pick a quiet model, and install it. Real bathrooms are less simple. A steamy mirror, a long duct run, or a poorly placed grille can change how well a fan performs. Building scientist Joseph Lstiburek’s often-cited principle, “Build tight, ventilate right,” captures why ventilation deserves careful attention. One fan does not fit every room.
This guide introduces seven checks before you buy. Match airflow to the bathroom and consider how duct length and bends may affect performance. Compare noise ratings, but do not choose on quietness alone. Look for useful features, such as a humidity sensor, and confirm the fan suits the installation location. Check the housing dimensions, duct connection, and access to wiring before opening the ceiling. Small details count. A strong fan can still disappoint when the duct is crushed or vents into an unsuitable space. That part is easy to overlook.
The right choice should remove humid air reliably without adding needless noise or energy use. Product labels help, but they do not replace checking the actual installation. I would be cautious about treating one airflow number as a universal answer; room layout and duct conditions matter. The following tips offer a practical checklist, not a substitute for a qualified installer when wiring or duct changes are involved. There is no perfect shortcut.
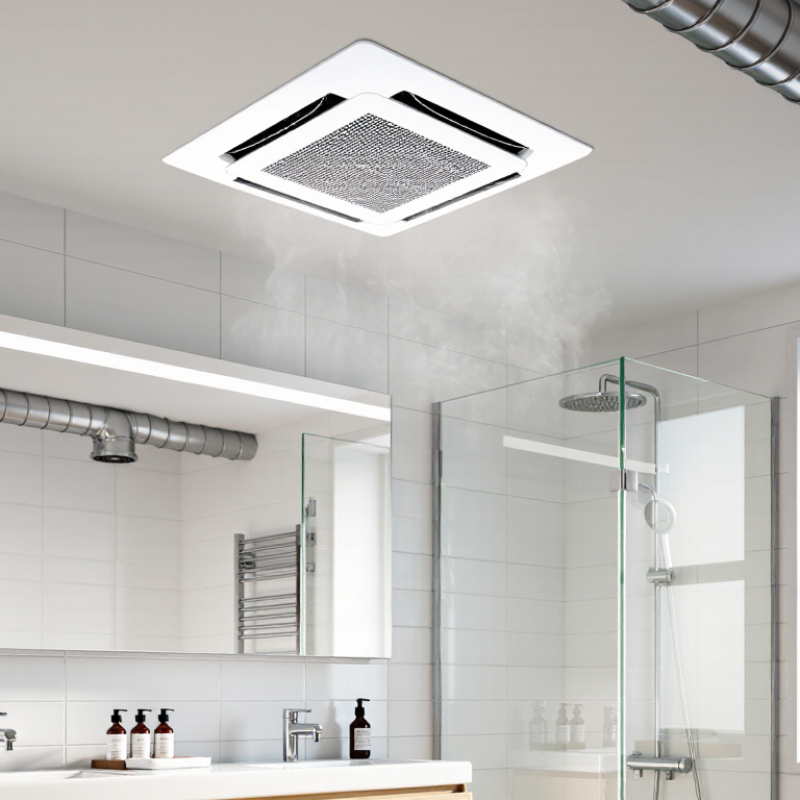
Tip: Measure the bathroom floor before choosing an exhaust fan. HVI recommends about 1 CFM of airflow per square foot for bathrooms up to 100 square feet. A 70-square-foot room would therefore need roughly 70 CFM. Small room? Check the fan’s minimum airflow guidance, too. That rule is useful, not magic.
Tip: Look beyond the room’s listed area. A long duct run, several bends, or a restrictive grille can reduce the air reaching outdoors. Check the installation instructions for duct size and approved configurations. If the fan will vent through a roof or exterior wall, plan that route before buying. I would not treat the square-foot calculation as a guarantee of real-world performance.
Tip: Match the fan to how the bathroom is used. A compact room with a frequently used shower may need steady ventilation after bathing. Listen to the fan in person if possible; a loud unit may be switched off more often. That detail is easy to overlook. Also check that the fan can connect to a suitable outdoor exhaust path, rather than simply moving damp air into an attic or wall cavity.
Check airflow before comparing noise levels or extra features. The International Residential Code (IRC) lists bathroom exhaust at 50 CFM for intermittent operation or 20 CFM for continuous operation. These are different operating strategies, not interchangeable fan settings. Local requirements can vary by code edition and adoption, so confirm what applies where you live.
HVI ventilation guidance recommends about 1 CFM per square foot for bathrooms up to 100 square feet, with a 50 CFM minimum. For an 8-by-10-foot bathroom, that points to 80 CFM—more than the IRC’s intermittent baseline. The figures serve different purposes: code minimums set a floor, while room size helps guide practical sizing. A common mistake is choosing a fan by its advertised airflow alone. Long ducts, bends, and restrictive grilles can reduce delivered airflow. Check the manufacturer’s performance data for your planned duct layout, and look for HVI-certified ratings where available. Small detail. Also consider whether the fan will run long enough after a shower; a quiet unit switched off too soon may not clear lingering moisture. I would not treat any single number as a guarantee of good ventilation.
A bathroom fan should clear moisture without dominating the room. Compare sound ratings in sones, not just vague descriptions such as “quiet.” A lower sone rating generally means the fan sounds quieter to people nearby. HVI certification matters because it indicates that performance ratings, including sound, were independently tested under a consistent program. Check that the listing names the exact model you are considering; similar-looking versions may have different ratings.
Tip: Compare fans at similar airflow levels, measured in cubic feet per minute. A very quiet fan may not move enough air for your bathroom. Small detail, big difference. Also check the duct size and installation requirements before buying.
A low sone number is useful, but it is not the whole story. A long, narrow duct or several sharp bends can make airflow noisier after installation. Loose mounting can add a faint rattle, even when the published rating looks good. I would treat the rating as a reliable comparison point, not a promise of silence in every home. If possible, listen to a working fan with a similar rating before deciding. The sound may feel different in a small tiled room than it does in a showroom.
| Buying Check | What to Look For | How to Use It |
|---|---|---|
| 1. Check the sound unit | Fan sound is commonly rated in sones; a lower sone value indicates quieter operation. | Compare sone ratings rather than relying only on descriptions such as “quiet” or “low noise.” |
| 2. Look for HVI certification | Check whether the fan’s published sound and airflow performance is HVI-certified. | Use certified ratings to compare tested performance, and confirm the exact model and rating in the product documentation. |
| 3. Compare ratings at the airflow you need | Sound level and airflow, measured in sones and cubic feet per minute (CFM), are separate performance figures. | Choose adequate airflow for the room first, then compare the sone ratings of fans that meet that need. |
| 4. Use sone values as a practical guide | Example ratings: 0.3, 0.5, 1.0, 1.5, and 2.0 sones. These are comparison examples, not product or certification requirements. | If low noise is a priority, compare options at the lower end of the ratings available for your required airflow. |
| 5. Check the installation details | Duct layout, duct size, bends, mounting, and vibration can affect the sound you hear after installation. | Follow the installation instructions and use compatible ductwork; a published rating alone cannot predict every installed result. |
| 6. Compare like with like | Compare sound ratings alongside airflow ratings and the stated test or operating conditions. | Avoid judging two fans by sone values alone if their airflow capacities or documented conditions differ. |
| 7. Verify the documentation | Look for the model-specific sone rating, CFM rating, certification information, and installation requirements. | If a sound rating or certification status is unclear, check the manufacturer’s technical sheet or the relevant certified-product directory before buying. |
A fan’s airflow rating only tells part of the story. Check the outlet diameter before buying, then compare it with the duct already in your ceiling or wall. A 4-inch fan connection paired with a smaller duct may restrict airflow and add noise. Adapters can help, but they do not erase the effects of a narrow passage.
Measure the full duct route, not just the visible section. Every bend, elbow, and extra foot adds resistance, especially in long runs. A fan rated for a short, straight duct may move less air in a route that winds through an attic. Check the installation instructions for the fan’s recommended duct size and airflow guidance. Close enough is not always close enough.
Small details matter. A crushed flexible duct or a loose joint can waste airflow before it reaches the exterior vent. If the run is long, has several bends, or needs a size change, compare the fan’s performance data for those conditions rather than relying only on its headline capacity. Measure twice. It is easy to overlook one elbow when estimating the route, and I would rather recheck the plan than discover the mismatch after the ceiling is closed.
When comparing bath exhaust fans, look beyond the control panel’s appearance. An ENERGY STAR certification can indicate that a model meets established energy-efficiency criteria, but check the exact model number in the current certification directory. Similar-looking versions may differ. Efficient operation matters most when the fan runs regularly, such as after a steamy morning shower.
Humidity sensing can switch a fan on when moisture rises and keep it running as the room dries. That is useful if household members often forget the wall switch. Check whether the sensor has adjustable settings and a manual override. In a small bathroom, a sensitive sensor may respond to a quick shower; placement and airflow also affect performance. There is no perfect setting for every room.
Tips: Compare sensor controls with a timer or separate wall switch, and check whether the fan offers both. Read the listed energy use and airflow specifications, then choose a unit suited to your bathroom size. After installation, observe whether the fan starts during ordinary showers and stops only after the mirror clears. That test may reveal a setting that needs adjustment.
ENERGY STAR® sets minimum fan-efficiency levels by airflow. Check the product’s certification and consider a humidity-sensing control for automatic operation when moisture rises.
Efficacy is airflow delivered per watt consumed (CFM/W); higher values indicate more airflow for the same power. Humidity sensing is a control feature and is not represented by these efficiency thresholds.
Taking Custom Design to New Levels

Brin Glass Company | Minneapolis, MN
St. Germain’s Glass | Duluth, MN
Heartland Glass | Waite Park, MN

Fabricator
Inside Sales and Client Support Manager
Glass Handler – 1st Shift